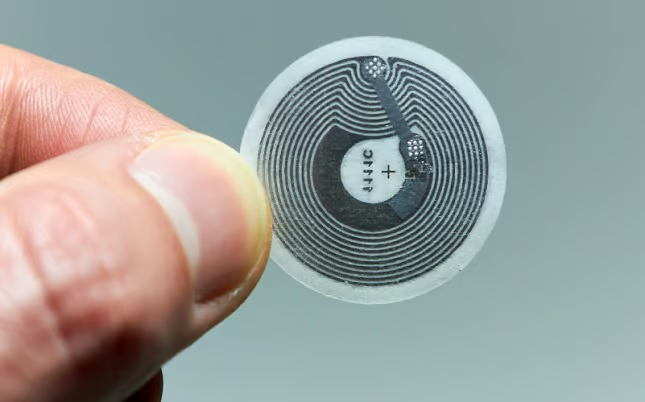
Near field communications (NFC) is an interesting technology that is built into most modern smartphones. Recently I read an article outlining how to read NFC tags on Android. The article did a good job at giving a basic overview of the implementation, but using the steps described left me with some questions and for my use case it did not work.
I’ve created this primer as a condensed explanation and implementation for those looking to add reading of Near Field Communication tags to their own Android project.
Implementation
Permissions
As with any Android application, you need to add permissions to allow your application to use the devices’ NFC hardware.
Within your Android.Manifest file, add the following:
1 | <uses-permission android:name=“android.permission.NFC” /> |
If you’re releasing your application to the Google Play Store, add the following to your manifest to ensure your application only shows up for those devices that support NFC:
1 2 | <uses-feature android:name=“android.hardware.nfc” android:required=“true” /> |
To really cover your bases, you might want to ensure the device’s minimum Android SDK is API level 10 (or 16 for Android Beam support) for complete NFC functionality:
1 | <uses-sdk android:minSdkVersion=“16” /> |
Intent filters
Next, you’ll want to set up an intent filter so the device launches your application upon detecting and reading a tag. The official Android documentation on NFC intent filtering is a great resource to learn more about NFC intents, including the “what”, “why”, and “how” to use them in various use-cases.
Here is an example intent filter.
1 2 3 4 5 | <intent-filter> <action android:name=“android.nfc.action.NDEF_DISCOVERED” /> <category android:name=“android.intent.category.DEFAULT” /> <data android:mimeType=“application/your.uniqueapp.nfc” /></intent-filter> |
What is the Mime Type on line 4? That is used by Android to determine which application should handle the NFC Tag. When creating yours, make sure it is unique to your application. In the example above “your.uniqueapp.nfc” can be “com.your.package.name.nfc”.
The idea of having a unique Mime Type on the NFC tags is to prevent the device from having to choose between launching multiple applications. If an Android device has to prompt a user to choose between multiple NFC reading applications the user will more likely than not pull the phone away from the NFC tag and sever the connection. Unlock the power of NFC on Android – Consult with Bluefletch experts today!
Application Code
Now for the fun part, the Code!
Android’s NFC Service will send your application the tag data using intents. Here is a simple method to process that intent. The code is assuming you’re getting NDEF message formatted data.
1 2 3 4 5 6 7 8 9 10 11 12 13 14 15 16 17 18 19 20 21 22 23 24 25 26 27 | private void processNFCData( Intent inputIntent ) { Parcelable[] rawMessages = inputIntent.getParcelableArrayExtra(NfcAdapter.EXTRA_NDEF_MESSAGES); if (rawMessages != null && rawMessages.length > 0) { NdefMessage[] messages = new NdefMessage[rawMessages.length]; for (int i = 0; i < rawMessages.length; i++) { messages[i] = (NdefMessage) rawMessages[i]; } Log.i(TAG, "message size = " + messages.length); // only one message sent during the Android beam // so you can just grab the first record. NdefMessage msg = (NdefMessage) rawMessages[0]; // record 0 contains the MIME type, record 1 is the AAR, if present String payloadStringData = new String(msg.getRecords()[0].getPayload()); // now do something with your payload payloadStringData }} |
Now, where should you invoke processNFCData? There are two places: onNewIntent and onResume. Why two places? Depends on your use case. If you’re reading a tag, then use onNewIntent. If you’re using Android Beam, then onResume.
1 2 3 4 5 6 7 8 9 10 11 12 13 14 15 16 17 18 19 20 21 | @Overrideprotected void onNewIntent(Intent intent) { super.onNewIntent(intent); if (intent != null && NfcAdapter.ACTION_NDEF_DISCOVERED.equals( intent.getAction() )) { // We scanned an NFC Tag. processNFCData( intent ); }}@Overrideprotected void onResume() { super.onResume(); // Check to see that the Activity started due to an Android Beam if (NfcAdapter.ACTION_NDEF_DISCOVERED.equals( getIntent().getAction() )) { // Yes, Activity start via Beam... wonder if we should pass a flag indicating Beam? processNFCData( getIntent() ); }} |
Next Steps
From here, you will need to add additional logic to process your tag’s data. As you’re working with NFC, make sure to add checks to verify that NFC is available and turned on. These can be accomplished by using the NfcAdapter class. Information about this class can be found within the Android Developer documentation.
If you still need some code to look at, I put together a simple application that uses Android Beam to send data. You can find the project on GitHub. The main part of the code is in the MainActivity, which can be found here.

Advantages of Android for Reading NFC Tags
Android offers unique advantages for reading NFC tags compared to other mobile operating systems:
- Widespread NFC hardware support – Most modern Android devices contain NFC radios that can read tags.
- Flexible development environments – Android’s NFC API is accessible using native Java or Kotlin code as well as cross-platform tools like React Native.
- Background tag reading – Android apps can read NFC tags even when the app is closed. iOS limits NFC actions to foreground apps only.
- Tag writing support – In addition to reading, Android provides APIs for writing to writable NFC tags.
- Standards support – Android’s NFC implementation supports all major tag types from NDEF to FeliCa.
- Greater control – Android allows apps to selectively disable other apps from accessing NFC hardware.
- With its open ecosystem and deeper NFC integration, Android provides the most flexible platform for tackling NFC tag reading projects. Integrate NFC technology into your Android apps – Book a strategy session now!
Recommendations for Android NFC Tag Reading Apps
When building Android apps involving NFC tag reading, here are some best practices to follow:
- Carefully manage permissions and security – Only request NFC permission when needed and transmit sensitive data securely.
- Optimize UX flows for quick tag interactions – Provide clear scanning instructions and feedback for short NFC transactions.
- Support multiple tag types – Check the Android API to support anticipated tag formats like NDEF, Mifare, etc.
- Handle connectivity issues gracefully – Account for hardware defects, low batteries, and out-of-range placement when scanning.
- Consider combo with alternate ID technologies – NFC can complement optical barcode scanning as a backup input option.
- Explore new use cases beyond payments – Tags can store links, contact info, credentials, interactive content and more.
- Comply with Play Store requirements – Avoid offensive, dangerous, or misleading NFC tag data.
With its versatile APIs, Android is perfect for innovative NFC applications spanning smart posters, contactless payments, interactive exhibitions, location check-ins, and IoT setup. Careful design ensures reliable and user-friendly tag reading. Maximize NFC capabilities on Android – Let Bluefletch guide your implementation!
In Closing
Near Field Communication is a relatively simple technology which can add useful functionality to many applications. The ability to quickly store and read data by tapping a device can be very useful.
Resources Referenced in this article.
Android Developers Guide on NFC
